W hen Caleb asked me to help him set up a Facebook livestream, I had no clue where to start. I wasn’t sure if we needed to pay for one of the many streaming services out there or if we could just plug our new DSLR into my laptop.
After some experimenting, I learned that all you really need to livestream to Facebook for free is a smart phone. That’s swell news for performers on a budget!!
In this post, however, I am going to go ahead and assume you want better audio 🔉 and video 📹 quality for your livestream than that. After all, what is the point of sharing your talents if others cannot appreciate them due to poor audio quality or extreme video buffering.
Without further ado, let’s get you livestreaming!
What are your Livestreaming goals?
The first step in Facebook live streaming is figuring out exactly what you want to share with your audience. Will it just be you in frame discussing a topic? Or are you and your four-piece band singing and playing instruments?
Obviously, the more moving parts, the more difficult the livestream will be to set up. On the other hand, more equipment can help you make a better product!
It’s a good idea to envision exactly what you need out of the livestream
before you go out and buy $1000+ worth of equipment.
Will the stuff you already have (like your smartphone camera or microphone you found in the attic) work to achieve the type of livestream you are shooting for?
My husband, Caleb, livestreams to Facebook every now and again singing and playing guitar. If you like to listen to and support some good ‘ole Texas country music, check out his originals on SoundCloud & Facebook 🙂 #ShamelessHubbiePlug
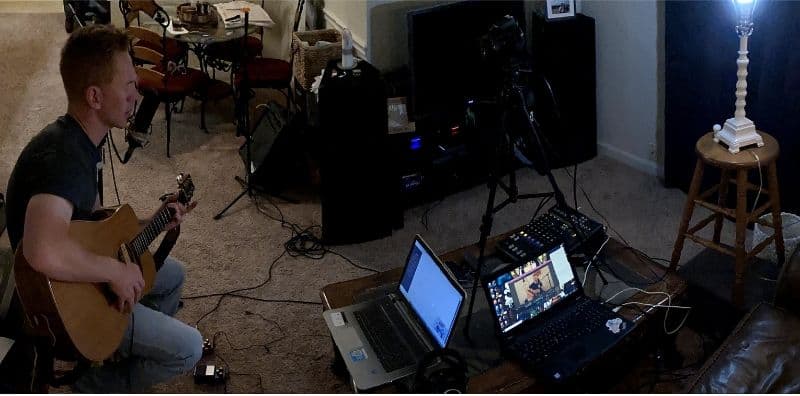
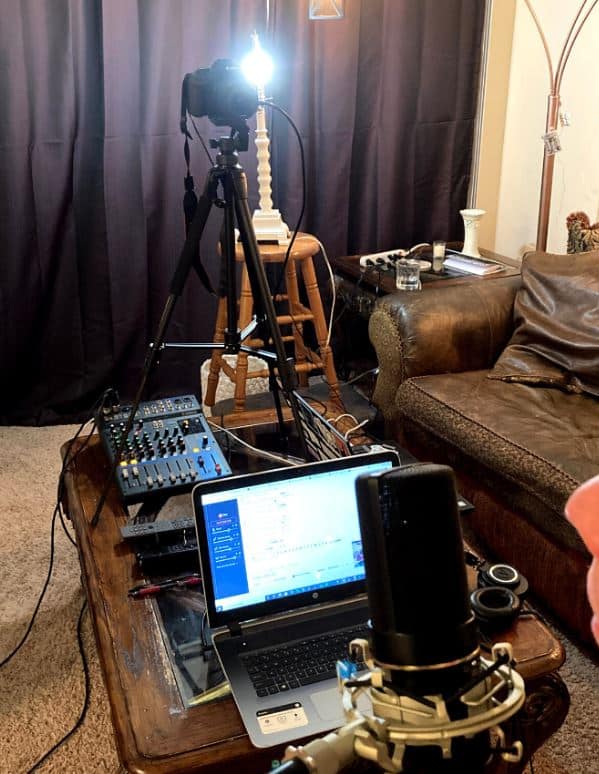
Since the first Facebook livestreams most people create are just a single, static person (like ours), I figured the most helpful thing for me to do is to share the exact setup we use!
A Recipe for Greatness (or a Basic Brown Family Musical Facebook Livestream):
There are 3 main “Zones” in our setup: Performer, Camera, & Mixer (or Subject, Video, Audio). I’m going to lay this out like a baking recipe🎂–I’ve already talked a bit about the yield, I’ll go over the ingredients, and finally walk you step-by-step through our setup process.
Just so you know, it takes us about 30 minutes to set up and test everything now. In the beginning, it took us 2 hours to connect everything (not to mention the research and purchases I had to make).
Performer (Subject) Zone:
- Strong Microphone Stand
- MXL-770X Vocal Microphone
- Stool–any old stool or chair
- Guitar picks–these are Caleb’s favorites: Snarling Dogs Brain Pick Pack 1.0 mm 13 Pack
- Performer
- Guitar–Caleb loves his Washburn acoustic that his Uncle Albert gave to him!
- Dean Markley acoustic guitar pickup (into the pedalboard)
- White Pedal–Donner DT Deluxe Guitar Chromatic Tuner Pedal ± 1 Cent
- Blue Pedal–Boss BD-2 Blues Driver Guitar Effects Pedal
- Red Pedal–BOSS DM-2W Waza Craft Analog Delay Pedal
- ¼ in cable (from pedalboard to amp
- Crate Amp (circa 1994)
- Shure SM58-LC Cardioid Dynamic Vocal Microphone, Black (pointed at amp)
- Microphone Stand
Mixer (Audio) Zone:
- 2 XLR cables (from mics to the mixer)
- Yamaha MG10XUF Mixer (scale the number of inputs / outputs to your needs)
- USB 2.0 cable
Laptops:
- Lenovo ThinkPad P51 (Something with processing power to run OBS and use Cam Link. You can check their stat requirements online!)
- Audio Technica Over-ear headphones (Plugged into “Phones/Monitor” jack on the board)
Camera (Video) Zone:
- DSLR Canon EOS T7
- Open Broadcasting Software (OBS)
- Cam Link made by Elgato
- HDMI to Mini HDMI
- Plug in-able camera battery (read all the risks / precautions associated with this before using)
- Tripod
- Facebook Streaming Key
- Lamp for (crappy) lighting (my next project is researching and amping up our lighting game!)
Here are the instructions for setting everything up!
Zone 1: Performer
Step 1.
Choose a spot for the performer to sit. This can be anywhere you want, but I encourage you to think about the backdrop, lighting, and acoustics of the space you’re in. Put your stool there. I like to make sure the background looks nice from the get-go as it’s easy to put off until the end. And then the livestream starts and you realize there’s a pile of dirty clothes in the shot and you’re either going to have to live with it or crawl over to the clothes and try to grab it with your hand without being detected…
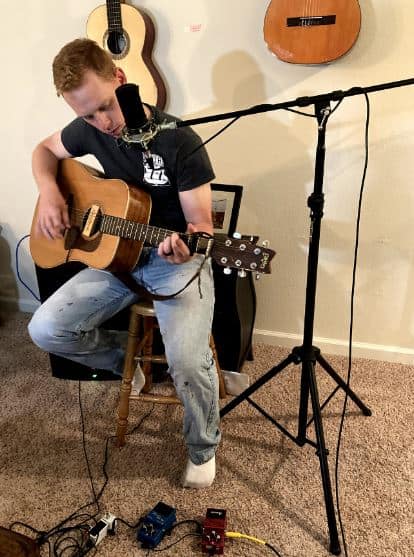
Step 2.
Screw MXL 770x microphone on strong mic stand in front of stool. A more dimpy mic stand like this one might work, but we found that over time, the microphone sagged and needed adjusting. Investing in a stronger, more versatile mic stand was a huge win for us!
Step 3.
Run an XLR cable from your microphone to the mixer. We usually have vocals as the first input and guitar as the second, but it doesn’t really matter as long as you know which one is which.
Step 4. (No Pedals)
If you aren’t using any pedals, connect your guitar to the mixer using a pickup. Since Caleb doesn’t have a built-in pickup to plug into, he uses a removable magnetic pickup. If you are using pedals, skip step 4.
Step 5. (With Pedals)
Connect your pedals to the mixer using a ¼ to ¼ inch cable and their various cables. I’m not a guitar player, so here’s Caleb on how he sets those up:
“Plug guitar into pedal one. Plug pedals into one other. Plug last pedal into amp. Thanks for coming to my TED Talk.”
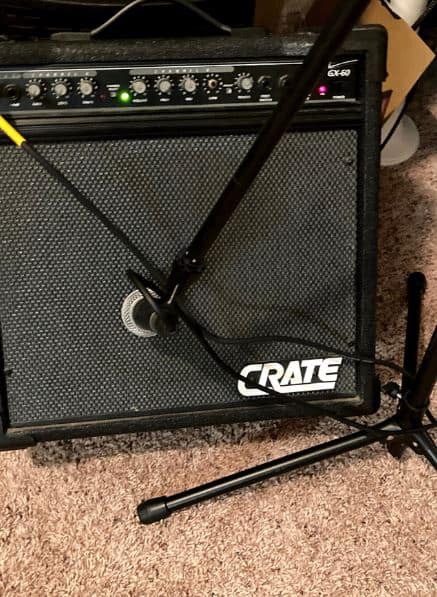
Step 6.
Set up a guitar amp facing toward the performer so they can hear his/herself, but far enough from the vocal microphone that it won’t pick up too much of the guitar amp’s output. Usually condenser mics have a cardioid option, so choose that one if applicable!
“When micing the amp, make sure to orient the mic appropriately. If you want more of the treble/highs, aim for the outside of the speaker ‘cone.’ The inner part of that speaker will bring out more of the bass/lows. I place mine mid-to-center.”-Caleb
Step 7.
We gather up some backup picks (do this if you’re playing guitar!) and place them in reaching distance. Caleb has been known to be a bit wily and fling picks around! “I also suck at fingerpicking, so that’s not an option.” -Caleb
“Leave beer in reaching distance too.” -Anonymous
Zone 2: Mixer
This is the one area where Caleb and I are pretty comfortable–me with my production course in college and him with his real-life live mixing experience.
Step 0.
Make sure your laptop(s) and phone(s) are charging and on silent. You don’t want them to die during the stream and you definitely don’t want them chirping during your talk or music!
Step 1.
Plug in and turn on the mixer. I always go ahead and turn off / reset all of the channels and turn down all of the sliders to make sure I don’t accidentally leave something ~strange~ (like weird reverb) on.
Step 2.
Make sure your vocal microphone and guitar line / amp microphone are both plugged into the mixer.
Step 3.
Run your USB 2.0 from the back of the mixer to your laptop’s USB port. Plug in your headphones to the “Phones/Monitor” jack.
Step 4.
Check the PFLs of the vocal and guitar. They should hit just above 0 dB when you’re around 80% of your loudest note. Test this with a high note or one of the louder strumming patterns that you intend to use during the stream.
Step 5.
Set your volume by running a test (either in your DAW or in the livestream if it’s cooperating…more on this in OBS later).
Zone 3: Camera
I have no clue how we figured this out. To be honest, we are still ironing out the whole DSLR-turns-off-after-20-minutes thing, but other than that, we miraculously learned how to use a camera.
Step 1.
Setup your camera on its tripod. We keep the camera horizontal because I prefer the way that looks on the Facebook livestream, but it’s up to your preference on that. Most platforms accommodate landscape mode.
Step 2.
Instead of the DSLR’s regular battery, plug in the AC Power Adaptor (aka plug in-able DSLR battery). This way, your camera won’t just run out of battery during a long livestream.
Step 3.
Though I somehow managed to figure it out (thanks Best Buy employees), there are many things that I am not capable of explaining. One such thing is the magic of DSLR-to-laptop connections, in which you probably need some kind of adapter to make your broadcast work.
That’s where the lovely Cam Link comes in. It’s a pretty affordable little gadget, and it does exactly what it is supposed to do–make sure your computer can process your livestream. Just connect the mini HDMI-regular HDMI cable from the camera’s output to the Cam Link plugged in to your laptop…and it works. *magic*
Step 4.
Turn your camera on. (At least I know how to do that!)
Step 5.
Now, some more magic. Open Broadcasting Software (OBS) is a border-line miraculous free streaming service that absolutely rocks.
Here are the steps for setting up your livestreamed video in OBS:
- Download OBS to your laptop (FOR FREE STREAMING!! https://obsproject.com/)
- Open it.
- Find the box in the bottom of the window that pops up titled “Sources”
- Right click in that black box, click “add” then “video capture device”
- Add a name if you want. Check the “make source visible” box.
- Click ok and the “properties” window should pop up. (If not, right click on your newly created “video capture device” then click “properties”)
- In the “device” dropdown, select the Cam Link option. Then click “activate.”
- In that same window, scroll down to “Audio Output Mode” and check the box that says “Use custom audio device.”
- Click ok. Now you can stretch / reshape your video to your heart’s content in the editor window. You can also add images in Sources>add>image (if your logo has a transparent background, you can do a little branding!
I’m going to be honest, there are 2 things I have not yet learned how to fix whilst livestreaming with my fancy-shmancy DSLR:
- It turns off after about 20 minutes of recording. I am sure there’s a way to fix this, just haven’t taken the time to check. All I have to do is turn it off and back on again and re-activate the video capture device in its properties menu, so it’s not a big deal.
- How to get the focusing square to stop showing up on the stream. I work around this by focusing on Caleb, moving the center of focus rectangle to the top left corner of the video, then cut that part of the shot out of the stream using the OBS editor window.
Step 6.
Now for the OBS audio:
- Add another source: “Audio Input Capture.”
- For the Device, choose whatever your mixer to USB “line” is called. Ours is “Line 3.” If your mixer to USB line is not showing up as an option, you’ll probably need to go into your computer’s sound settings and mess with the input your computer is recognizing.
- Click ok. If everything’s working, you should see the green bars picking up sound from your microphones (Not your computers’ mics. To make sure it’s not picking up the computer’s mics, we gently tap on our MXL-770X (no way the computer is picking that up).
- I usually go ahead and mute the desktop audio (and make sure my input isn’t muted).
Step 7.
Almost done! Next, we enter the Facebook streaming key.
- Log in to the Facebook account or page that you wish to stream from.
- Go to https://www.facebook.com/live/create
- Click the “Create Live Stream.”
- Follow the lovely streaming steps Facebook gives you. I checked the “Use a persistent stream key” box, so I don’t have to change it ever.
- Copy the stream key. Then navigate back to OBS.
- In the bottom right of your window, there is a box entitled “Controls.” Click on the “Settings” option.
- On the left-hand side there’s a menu. Click the “Stream” option.
- Input these options:
- “Service”: Facebook Live
- “Server”: Default
- “Stream Key”: [paste your stream key here]
- Click ok!
Step 8.
Click “Start Streaming” in OBS. (This doesn’t actually start the livestream on Facebook, don’t worry.)
Step 9.
Go to Facebook and add a title and description to your video.
It’s good practice to check once more that the shot is looking nice on the Facebook preview & that the audio is working.
Step 10.
Once you’ve completed all of these steps (or as many of these steps that you needed), click “Go Live” on Facebook to start your Facebook livestream! 🥂🎉
See, that wasn’t so hard! Aren’t you glad I went through all of the trial and error to figure this out so you don’t have to? “We screwed this up a lot of times. It sucked a lot.” -Caleb
Godspeed in your Facebook livestreaming endeavors, and please feel free to leave all of your livestreaming questions below!
Also, I recommend you check out the post Caleb wrote on how to assemble your live performance sound system.
Grace
Grace
Howdy, I’m Grace! I'm a Catholic music educator and voice teacher in Fort Worth, TX. Every week I share a podcast teaching Catholic kids sacred music--want to learn more? Try Sing With Grace for free today!